Illuminate Your Study Room with the Perfect Ceiling Light
A well-lit study room is essential for creating an environment that promotes productivity and concentration. Lighting plays a crucial role in our daily lives, and it has a significant impact on our mood, energy levels, and overall well-being. When it comes to studying or working in a study room, good lighting becomes even more important. In this article, we will explore the different types of ceiling lights suitable for study rooms, factors to consider when choosing a ceiling light, how to determine the right size of ceiling light, how to install and position a ceiling light, how to choose the right color temperature, how to avoid glare and eye strain, and how to maintain and clean your study room ceiling light.
Types of Ceiling Lights Suitable for Study Rooms
There are several types of ceiling lights lamp24 available that are suitable for study rooms. The most common types include recessed lights, pendant lights, flush mount lights, and track lights.
Recessed lights are a popular choice for study rooms because they provide a clean and modern look. They are installed into the ceiling and provide a focused beam of light. Recessed lights are versatile and can be used to create different lighting effects depending on the placement and angle of the fixtures. However, they may require professional installation and can be more expensive compared to other types of ceiling lights.
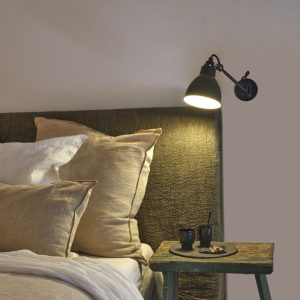
Pendant lights are another popular choice for study rooms. They hang from the ceiling and provide both ambient and task lighting. Pendant lights come in various styles and designs, making them a versatile option that can complement any study room decor. However, they may not provide as much focused light as recessed lights and may require additional lighting sources for optimal illumination.
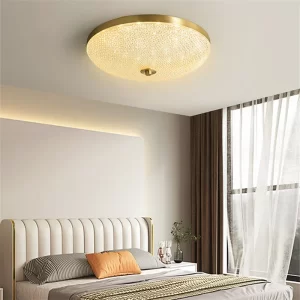
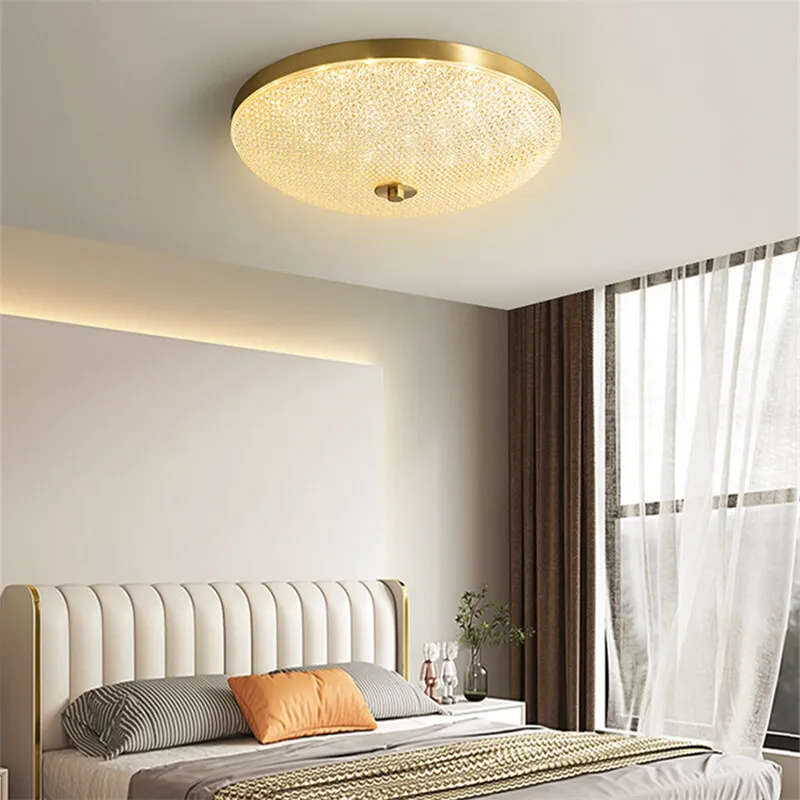
Flush mount lights are a practical choice for study rooms with low ceilings. They are installed directly onto the ceiling surface and provide general illumination throughout the room. Flush mount lights come in various styles and designs, making them suitable for any study room decor. However, they may not provide as much focused light as recessed or pendant lights.
Track lights are a flexible option for study rooms. They consist of a track that holds multiple light fixtures, which can be adjusted and directed to provide focused lighting where needed. Track lights are ideal for study rooms that require adjustable lighting for different tasks or areas. However, they may not provide as much general illumination as other types of ceiling lights.
Factors to Consider When Choosing a Ceiling Light for Your Study Room
When choosing a ceiling light for your study room, there are several factors to consider. These factors include the size of the room, the height of the ceiling, the purpose of the room, and personal preferences.
The size of the room is an important factor to consider when choosing a ceiling light. A larger room may require multiple ceiling lights or larger fixtures to provide adequate illumination. On the other hand, a smaller room may only require one ceiling light or smaller fixtures. It is important to ensure that the chosen ceiling light provides enough light to cover the entire study area without creating shadows or dark spots.
The height of the ceiling is another factor to consider when choosing a ceiling light. Rooms with higher ceilings may require pendant lights or track lights that can hang lower to provide optimal illumination. Rooms with lower ceilings may require flush mount lights or recessed lights that sit closer to the ceiling surface. It is important to choose a ceiling light that fits well within the space and does not obstruct any furniture or decor.
The purpose of the room also affects the choice of ceiling light. If the study room is primarily used for reading or studying, it may require a brighter and more focused light source. If the study room is used for various activities such as reading, writing, and computer work, it may require a combination of ambient and task lighting. It is important to consider how the room will be used and choose a ceiling light that meets those needs.
Personal preferences also play a role in choosing a ceiling light. Some people prefer a more modern and minimalist look, while others prefer a more traditional or decorative style. It is important to choose a ceiling light that matches the overall decor and style of the study room.
How to Determine the Right Size of Ceiling Light for Your Study Room
Determining the right size of ceiling light for your study room is essential to ensure optimal illumination. The size of the ceiling light is determined by the size of the room and the height of the ceiling.
To determine the right size of ceiling light, start by measuring the length and width of the room in feet. For example, if your study room measures 10 feet by 12 feet, multiply these two numbers together to get the square footage of the room, which in this case would be 120 square feet.
Next, use this square footage to determine the wattage needed for the ceiling light. As a general rule, you should aim for 20 lumens per square foot of space. Multiply the square footage by 20 to get the total number of lumens needed. In this example, you would need a ceiling light that provides 2,400 lumens (120 square feet x 20 lumens per square foot).
Once you have determined the total number of lumens needed, you can choose a ceiling light that meets this requirement. Keep in mind that different types of ceiling lights have different lumen outputs, so it is important to check the specifications of each light fixture before making a decision.
How to Install a Ceiling Light in Your Study Room
Installing a ceiling light in your study room can be a relatively simple process if you have some basic electrical knowledge and skills. However, if you are not comfortable working with electricity, it is always best to hire a professional electrician to do the installation for you.
Before starting the installation process, make sure to turn off the power to the room at the circuit breaker. This will ensure your safety while working with electrical wires.
To install a ceiling light, follow these steps:
1. Remove the existing light fixture, if applicable. This may involve unscrewing the fixture from the ceiling or disconnecting any wires.
2. Install a new electrical box if needed. If there is no existing electrical box or if the current box is not suitable for the new ceiling light, you will need to install a new one. Follow the manufacturer’s instructions for installing the electrical box.
3. Connect the wires. Most ceiling lights have three wires – a black wire (hot), a white wire (neutral), and a green or copper wire (ground). Connect the corresponding wires from the ceiling light to the wires in the electrical box using wire nuts. Make sure to match the colors correctly.
4. Attach the ceiling light to the electrical box. Follow the manufacturer’s instructions for attaching the ceiling light to the electrical box. This may involve screwing in screws or using other mounting hardware.
5. Install the light bulbs and shades, if applicable. Follow the manufacturer’s instructions for installing the light bulbs and shades on your ceiling light.
6. Turn on the power and test the light. Once you have completed the installation, turn on the power at the circuit breaker and test the light to make sure it is working properly.
Tips for Positioning Your Ceiling Light for Optimal Lighting in Your Study Room

Proper positioning of your ceiling light is crucial for achieving optimal lighting in your study room. The position of the light can affect how well you can see and how comfortable you feel while studying or working.
Here are some tips for positioning your ceiling light:
1. Position the light in the center of the room. Placing the ceiling light in the center of the room will provide more even illumination throughout the space.
2. Consider the placement of furniture and work areas. If you have a specific area in the study room where you will be working or studying, position the ceiling light directly above that area to provide focused lighting.
3. Avoid placing the light too close to walls or corners. Placing the ceiling light too close to walls or corners can create shadows and uneven lighting. Aim to position the light at least a few feet away from any walls or corners.
4. Use multiple light sources for larger rooms. If your study room is large, consider using multiple ceiling lights or combining them with other types of lighting, such as floor lamps or desk lamps, to provide adequate illumination.
5. Consider the height of the ceiling. The height of the ceiling can affect how well the light spreads throughout the room. If you have a high ceiling, consider using pendant lights or track lights that can hang lower to provide more focused lighting.
How to Choose the Right Color Temperature for Your Study Room Ceiling Light
Choosing the right color temperature for your study room ceiling light is important for creating a comfortable and productive environment. Color temperature refers to the appearance of light, ranging from warm (yellowish) to cool (bluish) tones.
The color temperature of a light source is measured in Kelvin (K). Lower Kelvin values (around 2700K-3000K) produce warm and cozy light, similar to traditional incandescent bulbs. Higher Kelvin values (around 5000K-6500K) produce cool and bright light, similar to daylight.
When choosing the right color temperature for your study room ceiling light, consider the following factors:
1. Task requirements: The color temperature of the light can affect how well you can see and perform tasks. For reading and studying, it is generally recommended to use a cooler color temperature (around 4000K-5000K) as it provides better visibility and reduces eye strain.
2. Personal preference: Some people prefer warmer color temperatures as they create a more relaxed and cozy atmosphere. Others prefer cooler color temperatures as they provide a brighter and more energizing environment. Consider your personal preference and how it affects your mood and productivity.
3. Room decor: The color temperature of the ceiling light should complement the overall decor and style of the study room. Warm color temperatures (around 2700K-3000K) are often used in traditional or rustic settings, while cooler color temperatures (around 4000K-5000K) are more commonly used in modern or contemporary settings.
It is important to note that color temperature can also affect the appearance of colors in the room. Cooler color temperatures can make colors appear more vibrant and true to life, while warmer color temperatures can make colors appear warmer and softer.
How to Adjust Your Ceiling Light to Avoid Glare and Eye Strain
Avoiding glare and eye strain is crucial for maintaining a comfortable and productive study environment. Glare occurs when there is excessive brightness or contrast between the light source and the surrounding area, causing discomfort and visual fatigue. Here are some tips for adjusting your ceiling light to avoid glare and eye strain:
1. Use shades or diffusers: If your ceiling light does not come with shades or diffusers, consider adding them to reduce direct glare. Shades or diffusers can help distribute the light more evenly and reduce harsh shadows.
2. Position the light properly: Avoid positioning the ceiling light directly above your line of sight, as this can cause direct glare. Instead, position the light slightly off to the side or at an angle to minimize glare.
3. Use indirect lighting: Indirect lighting bounces light off walls or ceilings, creating a softer and more diffused illumination. This can help reduce glare and create a more comfortable study environment.
4. Adjust the brightness: If your ceiling light has adjustable brightness settings, experiment with different levels to find the most comfortable and suitable setting for your study needs. Avoid using overly bright lights, as they can cause eye strain.
5. Consider task lighting: In addition to your ceiling light, consider using task lighting such as desk lamps or floor lamps to provide focused lighting for specific tasks. This can help reduce the need for bright overhead lighting and minimize glare.
How to Maintain and Clean Your Study Room Ceiling Light
Maintaining and cleaning your study room ceiling light is important for ensuring optimal performance and longevity. Here are some tips for maintaining and cleaning your ceiling light:
1. Turn off the power: Before cleaning or performing any maintenance on your ceiling light, make sure to turn off the power at the circuit breaker to ensure your safety.
2. Dust regularly: Dust can accumulate on the surface of your ceiling light, reducing its brightness and effectiveness. Use a soft cloth or duster to gently remove any dust from the fixture.
3. Clean with mild soap and water: If your ceiling light becomes dirty or stained, you can clean it with a mixture of mild soap and water. Dampen a soft cloth with the soapy water and gently wipe down the fixture. Avoid using abrasive cleaners or scrubbing too hard, as this can damage the surface.
4. Replace burnt-out bulbs: If any of the light bulbs in your ceiling light burn out, make sure to replace them promptly. Burnt-out bulbs can affect the overall illumination of the room and reduce the lifespan of the remaining bulbs.
5. Check for loose connections: Periodically check the connections between the ceiling light and the electrical box to ensure they are secure. Loose connections can cause flickering or intermittent lighting.
6. Schedule professional maintenance: If you are unsure about how to properly maintain or clean your ceiling light, it is always best to consult a professional electrician. They can provide expert advice and perform any necessary maintenance or repairs.
Conclusion and Final Thoughts on the Benefits of a Well-Lit Study Room
In conclusion, good lighting is essential for creating a study room that promotes productivity and concentration. The type of ceiling light, its size, position, color temperature, and maintenance all play a crucial role in achieving optimal lighting in your study room. By carefully considering these factors and following the tips provided in this article, you can create a well-lit study room that enhances your learning experience and helps you achieve your goals. Investing in good lighting for your study room is an investment in your education and future success.